
Installing a geotechnical inclinometer is a crucial step in engineering monitoring, especially in
slope monitoring, tunnel monitoring, bridge monitoring, structural monitoring and other geotechnical monitoring. Proper installation ensures accurate monitoring data collection, analysis and monitoring reports, which are essential for effective risk management. This article outlines the steps involved in installing a geotechnical inclinometer- Inclino-Robot, introduced by GeoSitter https://www.geositter.com/, one of the companies for providing monitoring instruments and softwares.
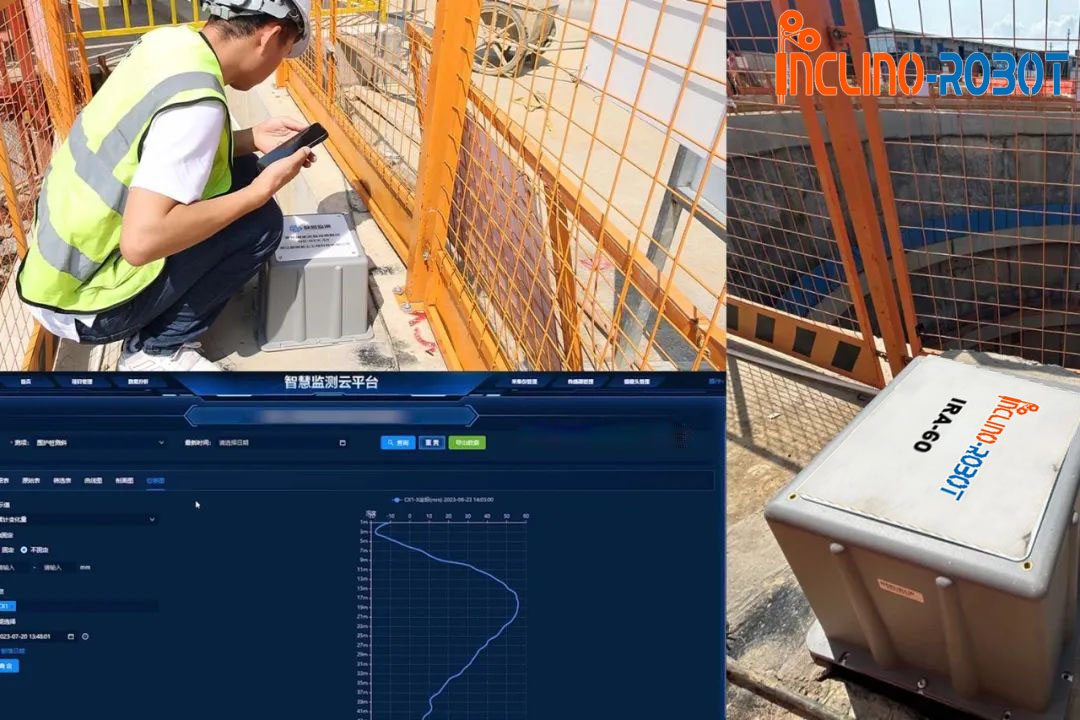
Our Inclino-Robot includes IRA and IRM, respectively achieving automatic measurement and achieving fast and accurate measurement.
IRA:
Data collection and transmission are fully automated, which can completely replace IPI and SAA.
The testing principle is exactly the same as the manual inclinometer, and it can achieve a 0.5m interval.
The procurement, use, calibration, and maintenance costs are low.
Fast and easy installation.
Portable with small volume and light weight.
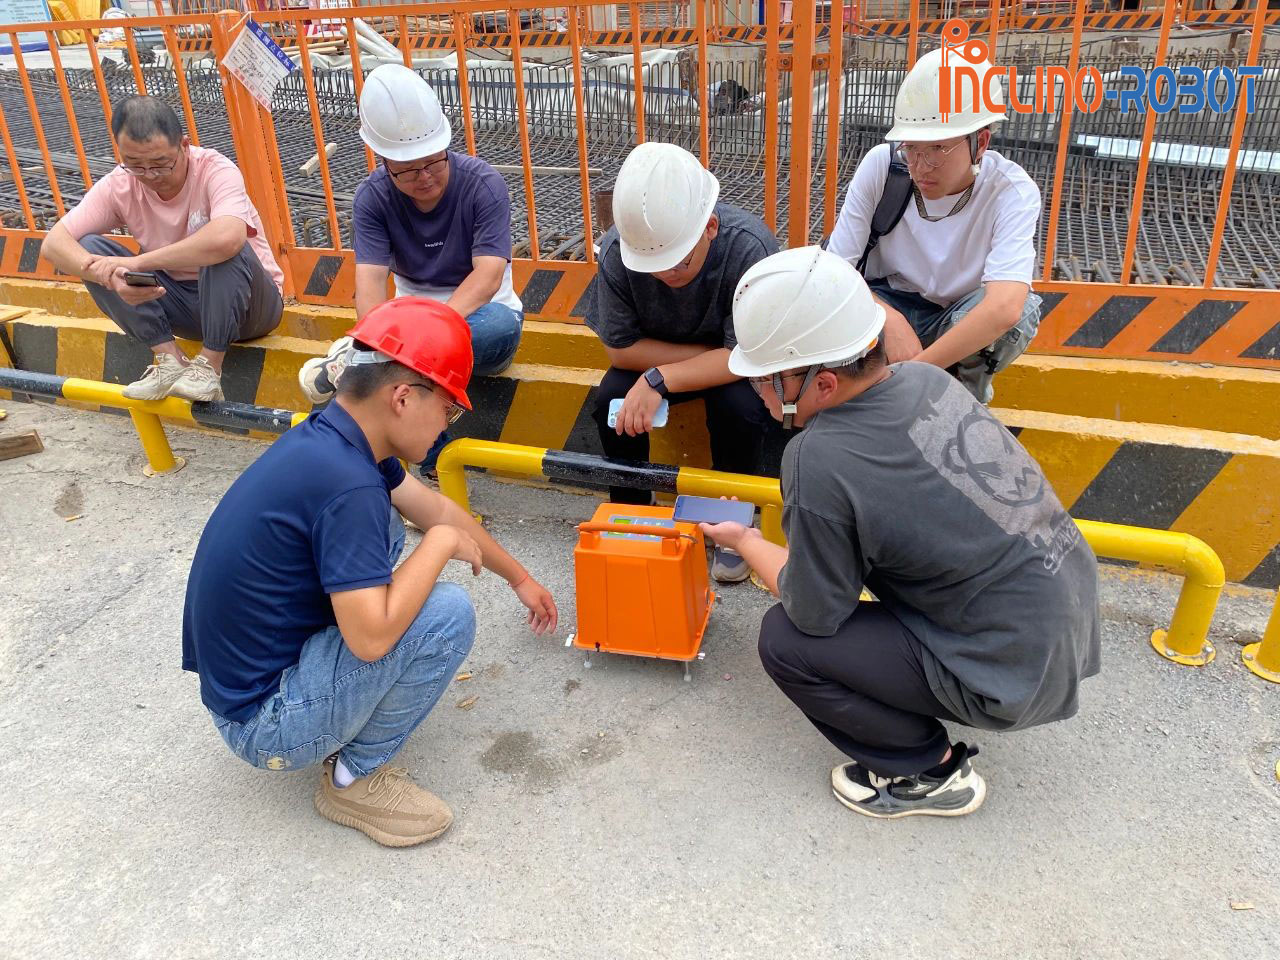
One-button measurement, automatic operation, data collection, and transmission.
One person can simultaneously operate multiple devices, significantly improving measurement efficiency.
No manual wire pulling required; greatly reducing labor intensity.
Data is stored and analyzed in the cloud eliminating the risk of data loss.
Affordable price with high cost-performance ratio.
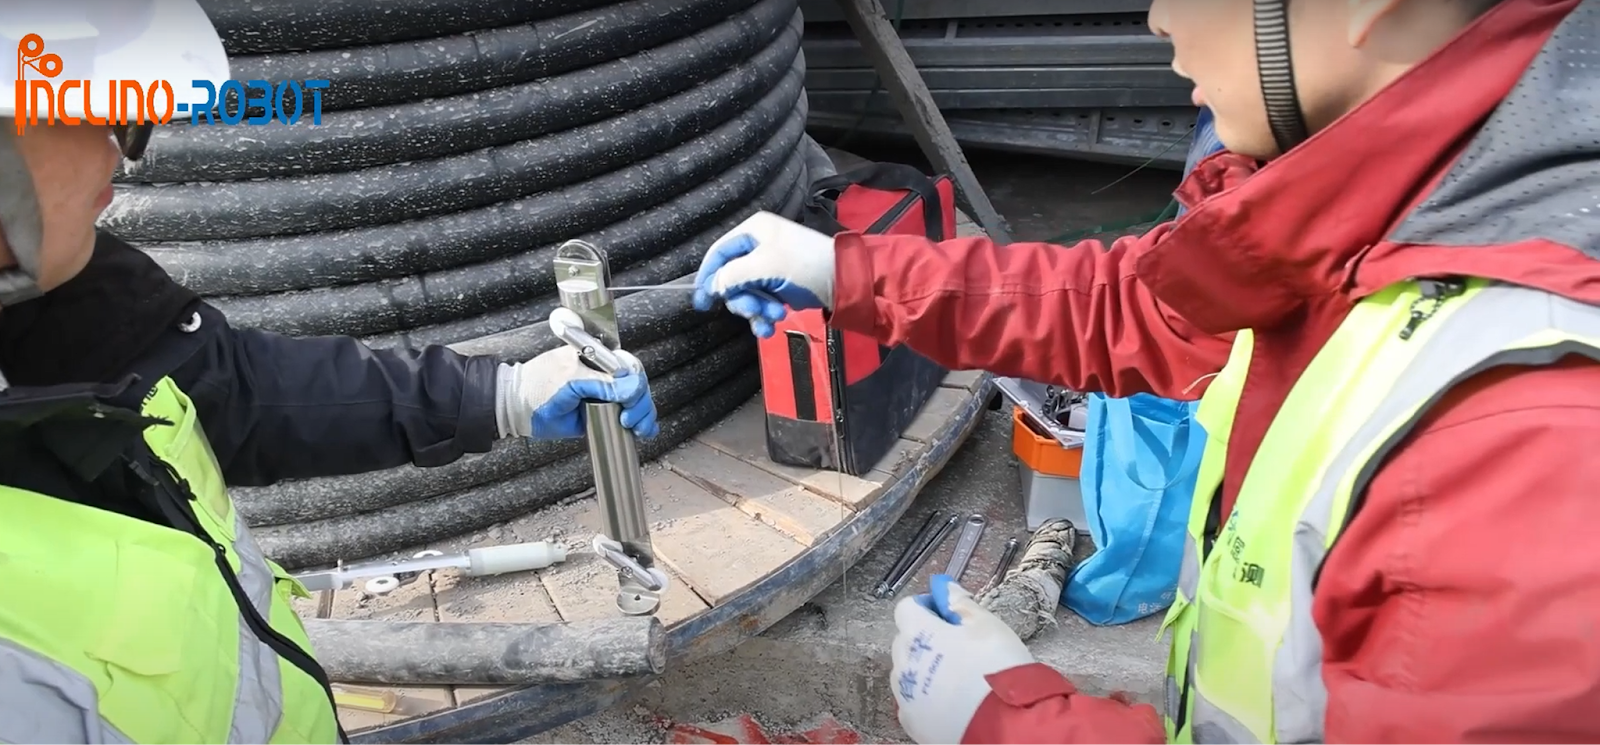
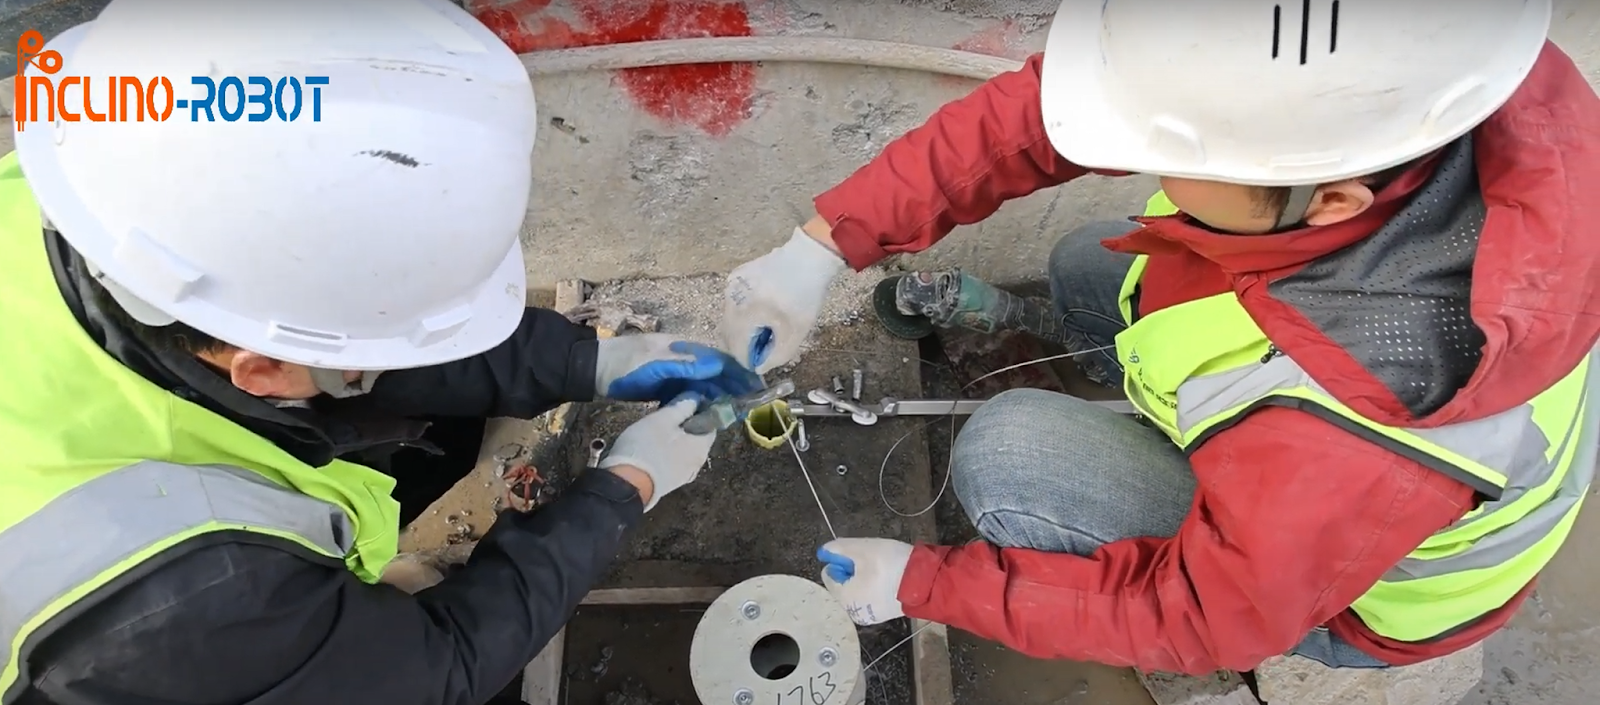
Before commencing installation, it's important to understand the components of a geotechnical inclinometer system. Typically, the system comprises an inclinometer casing, a counterweight block, a drive cable, and a sensor probe. The casing is installed vertically into a borehole drilled into the soil or rock, while the counterweight block, drive cable, and sensor probe are inserted into the casing.During installation configuration, ensure that the borehole is drilled to the desired depth and diameter, and that the casing is properly seated and secured in the borehole. It's also important to inspect the casing for any damage or obstructions that could hinder the installation process.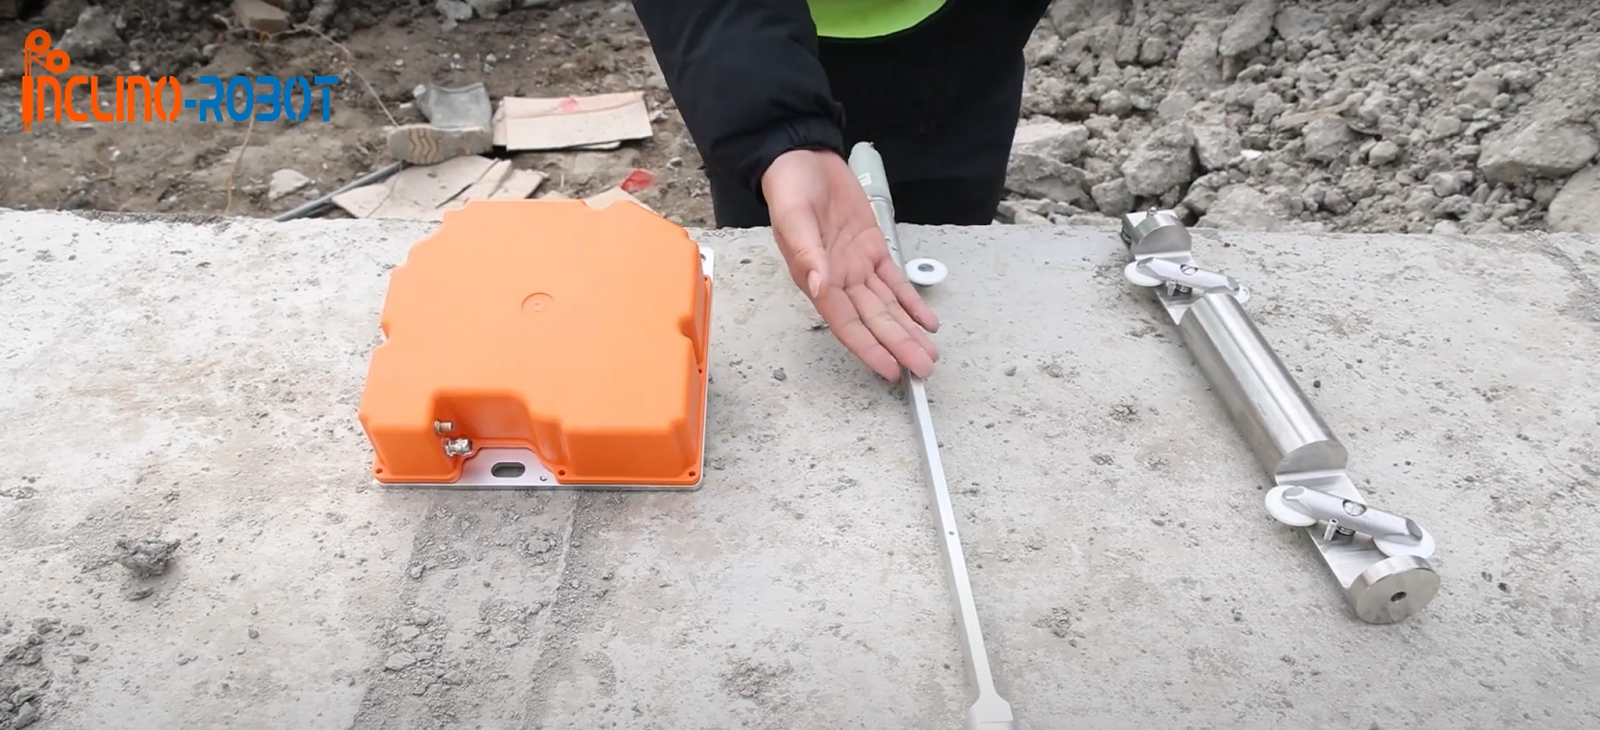
The counterweight block is responsible for tensioning the drive cable and providing the necessary force to lower the sensor probe into the casing. Begin by attaching the counterweight block to the end of the drive cable using the provided connector. Ensure that the connection is secure and that the counterweight block can slide freely along the cable.Next, suspend the counterweight block and cable from a stable support structure above the borehole. Adjust the height of the counterweight block to ensure that the cable is taut but not overly tensioned. This will help ensure smooth operation of the inclinometer system.
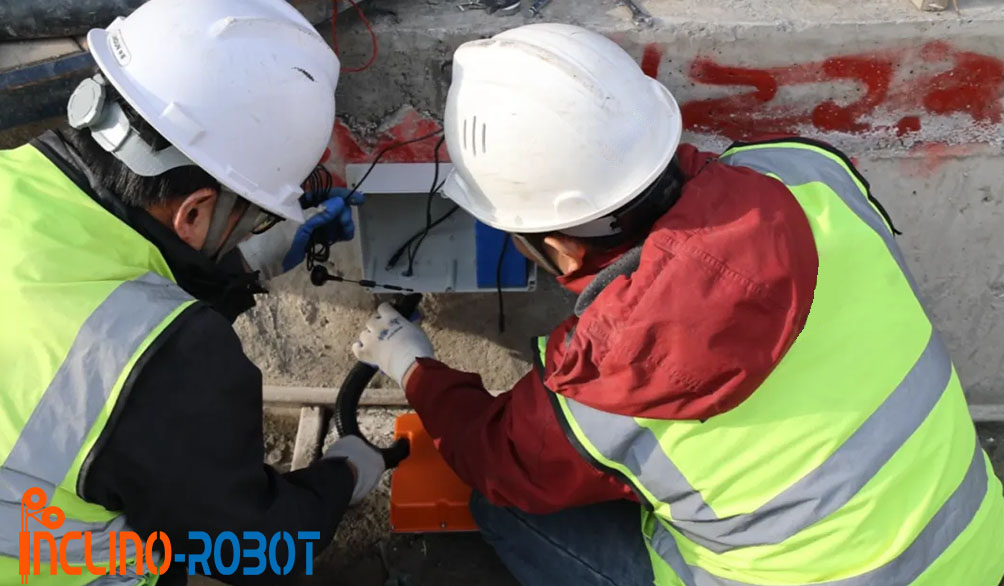
The drive wiring connects the sensor probe to the data acquisition system, allowing for real-time monitoring and data collection. Begin by connecting the drive wiring to the sensor probe using the provided connectors. Ensure that the connections are tight and secure to prevent any loss of signal.Next, route the drive wiring through the casing and up to the data acquisition system. It's important to keep the wiring away from potential obstructions or hazards that could damage it. Consider using conduit or protective sheathing to protect the wiring from abrasion or other damage.
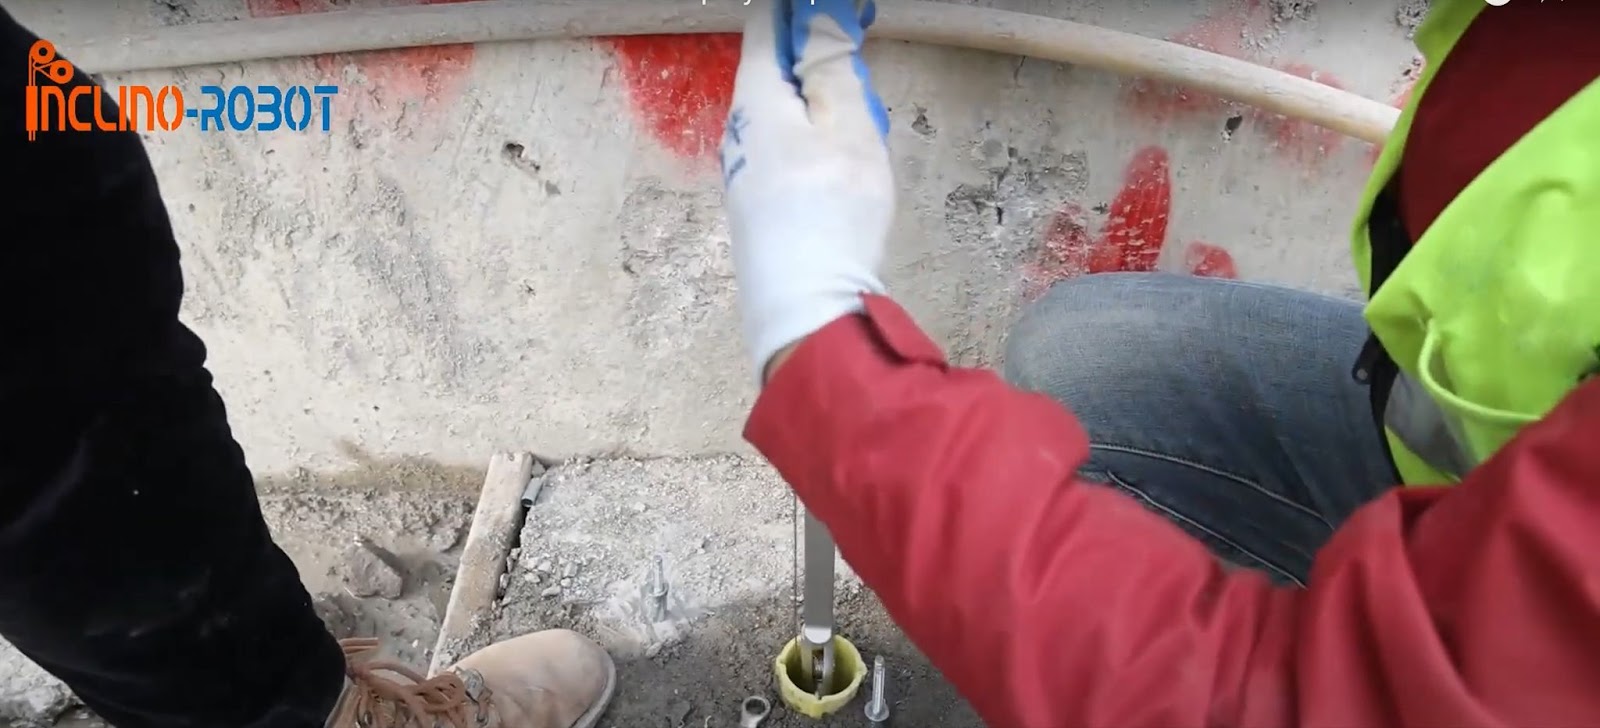
Once the counterweight block and drive wiring are installed, you can begin lowering the sensor probe into the casing. Slowly release the counterweight block, allowing the cable and sensor probe to descend into the casing. Monitor the descent carefully to ensure that the probe moves smoothly and does not encounter any obstructions.As the probe descends, it will record soil or rock movements along the length of the casing. The data collected by the sensor probe is transmitted through the drive wiring to the data acquisition system, allowing for real-time monitoring and analysis.Once the sensor probe has reached the desired depth, secure it in place using the provided locking mechanism. Ensure that the probe is securely locked in place to prevent any movement or drift.Finally, conduct a thorough inspection of the entire inclinometer system to ensure that all components are properly installed and functioning correctly. This includes checking the connections, ensuring that the wiring is free from damage, and verifying that the sensor probe is accurately recording data.
By following these steps carefully, you can ensure a successful installation of your geotechnical inclinometer system, allowing for accurate monitoring and analysis of soil and rock movements in your area of interest.
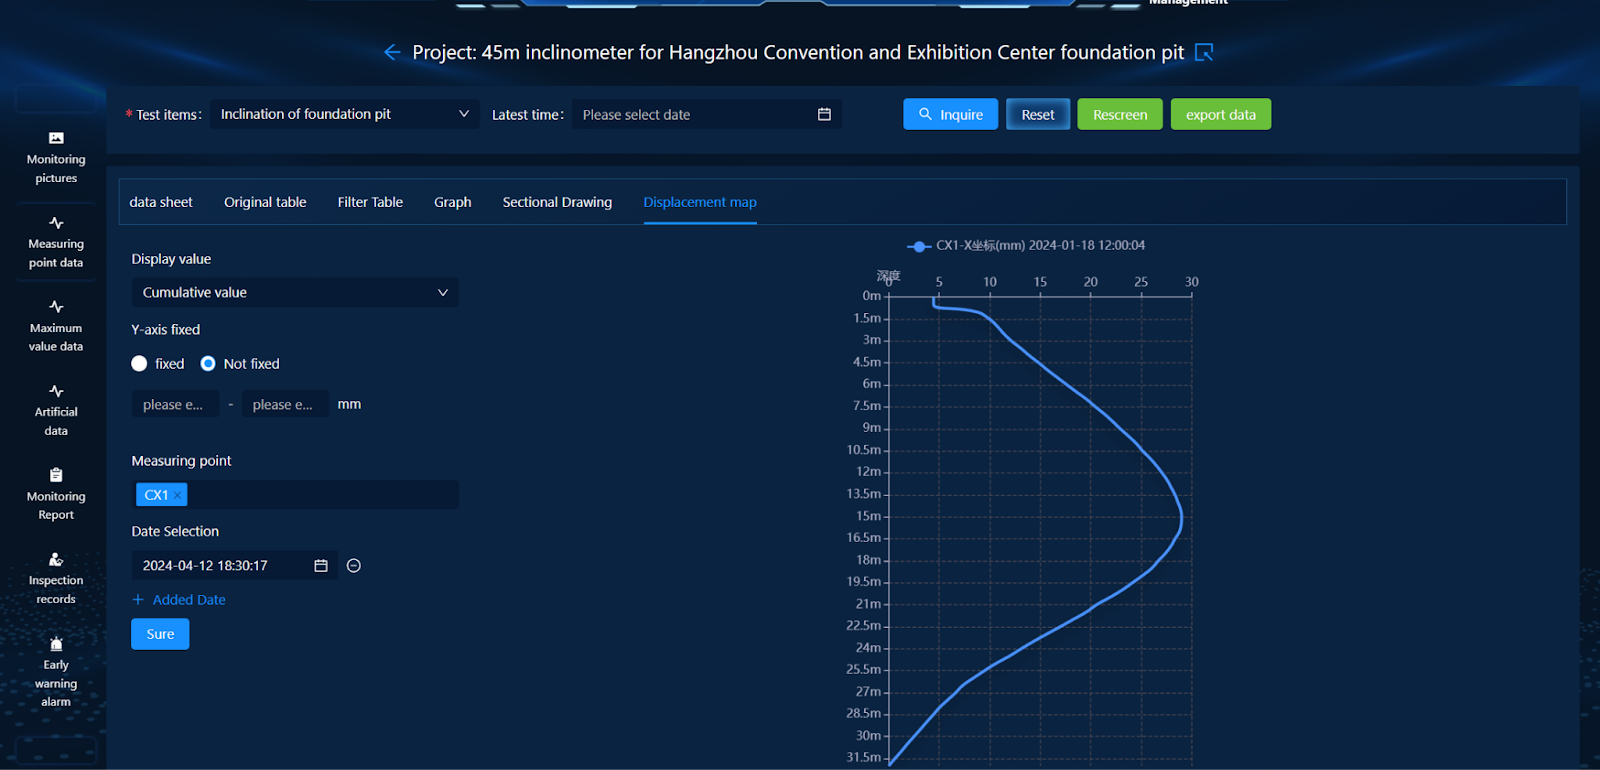
We also introduce a construction monitoring software, developed by a professional technical team, which includes engineers with over 10 years of practical experience in fields such as geotechnical instruments, water conservancy, transportation, surveying, and the Internet of Things. It can accurately meet the application requirements of automated monitoring.
For a free test account of this construction monitoring system, please quickly contact us by the email info@geositter.com and phone number +8613868064820

Copyright @ 2025Inclino-Robot All Rights Reserved
浙ICP备16004329号-5